Running on Replit
Contents of this page:
Replit provides a cloud-hosted integrated development environment that your students can use to run (and develop) their buggy editors.
The great thing about using a service like this is that the development environment is ready-to-go: no setup needed by the students.
Because it’s in the cloud, a student who is only working on Replit must be online to work.
The basic service described here is free.
In the first year of running this project (2020), we were in full UK Covid lockdown. We used Replit as the fall-back for students who did not have hardware that supported local installation of a Python environment (although it turned out some preferred to work this way anyway). That’s why, from the start, the buggy editor repo has contained a .replit config file which helps streamline Replit set-up.
What follows are the manual steps for getting the editor running up on Replit, with a (basic, free) student account. Replit has an educational tier, so it’s possible you could automate this process so accounts are already set up for all your students.
Set up the repl
Log into your Replit account and choose Create repl.
Choose Import from GitHub (instead of the other options which are about using a template).
Enter the GitHub URL of the editor repo:
https://github.com/USERNAME/buggy-race-editor.git
(you get that by going to the repo on GitHub and clicking on the green Code button).
Replit will notice that it’s a Python project, so the Language picker will automatically switch to that. Click on the Import from GitHub button.
It takes a little while to import and set everything up. When it’s done, if you’re new to Replit you’ll see a “Welcome to the Workspace” dialogue which will guide you through the interface.
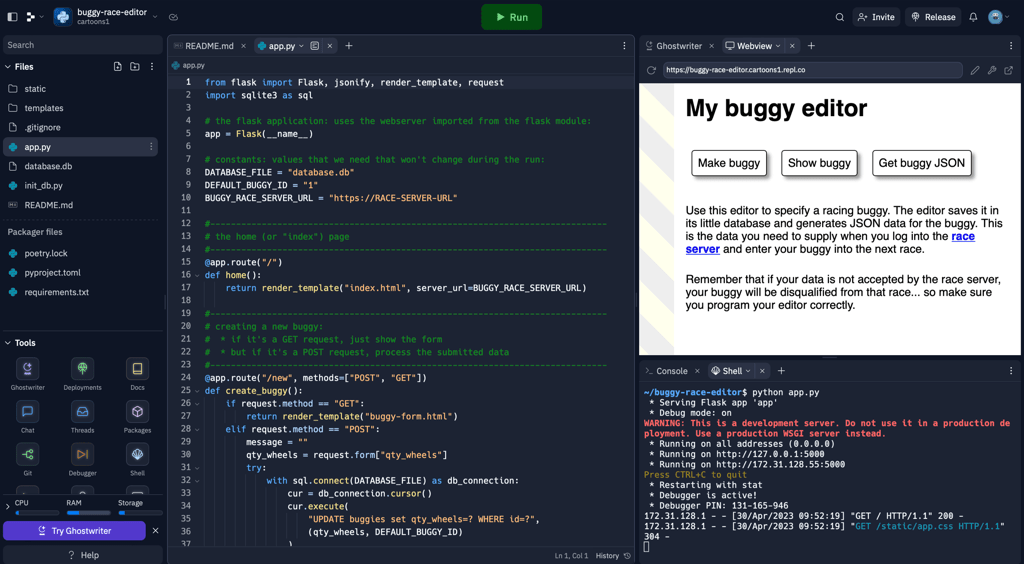
Run the webserver
You can run app.py by clicking the green Run button at the top of the screen. However, we recommend doing it the manual way — using the shell, described below — because then you’re more in control (and we’ve seen Replit get stuck with its own processes and needing a whole-page refresh to get back).
Replit knows this is a webserver, so it helpfully presents the home page (the / route) in a panel within the Workspace when you launch the app. You can break that panel out and run it in a separate window if you prefer.
Using the shell
In the bottom right panel of the default repl layout there’s a “shell” tab — click on that to get access to a terminal shell.
You can run the webserver like this:
~/buggy-race-editor$ python app.py
You can stop the app running by interrupting it with Ctl-C (if the shell doesn’t have focus in that web page, clicking on the shell first).
Initialising the database
You don’t need to initialise the database the first time you run because the .replit file we put in the editor repo already does that for you. (If you don’t want that behaviour for your students, maybe remove the .replit file from the buggy editor repo before sharing it with them).
To initialise the database manually, do this:
~/buggy-race-editor$ python init_db.py
- Previous: Running on PythonAnywhere
- Next: Running remotely